OSINT Toolbox
About the App
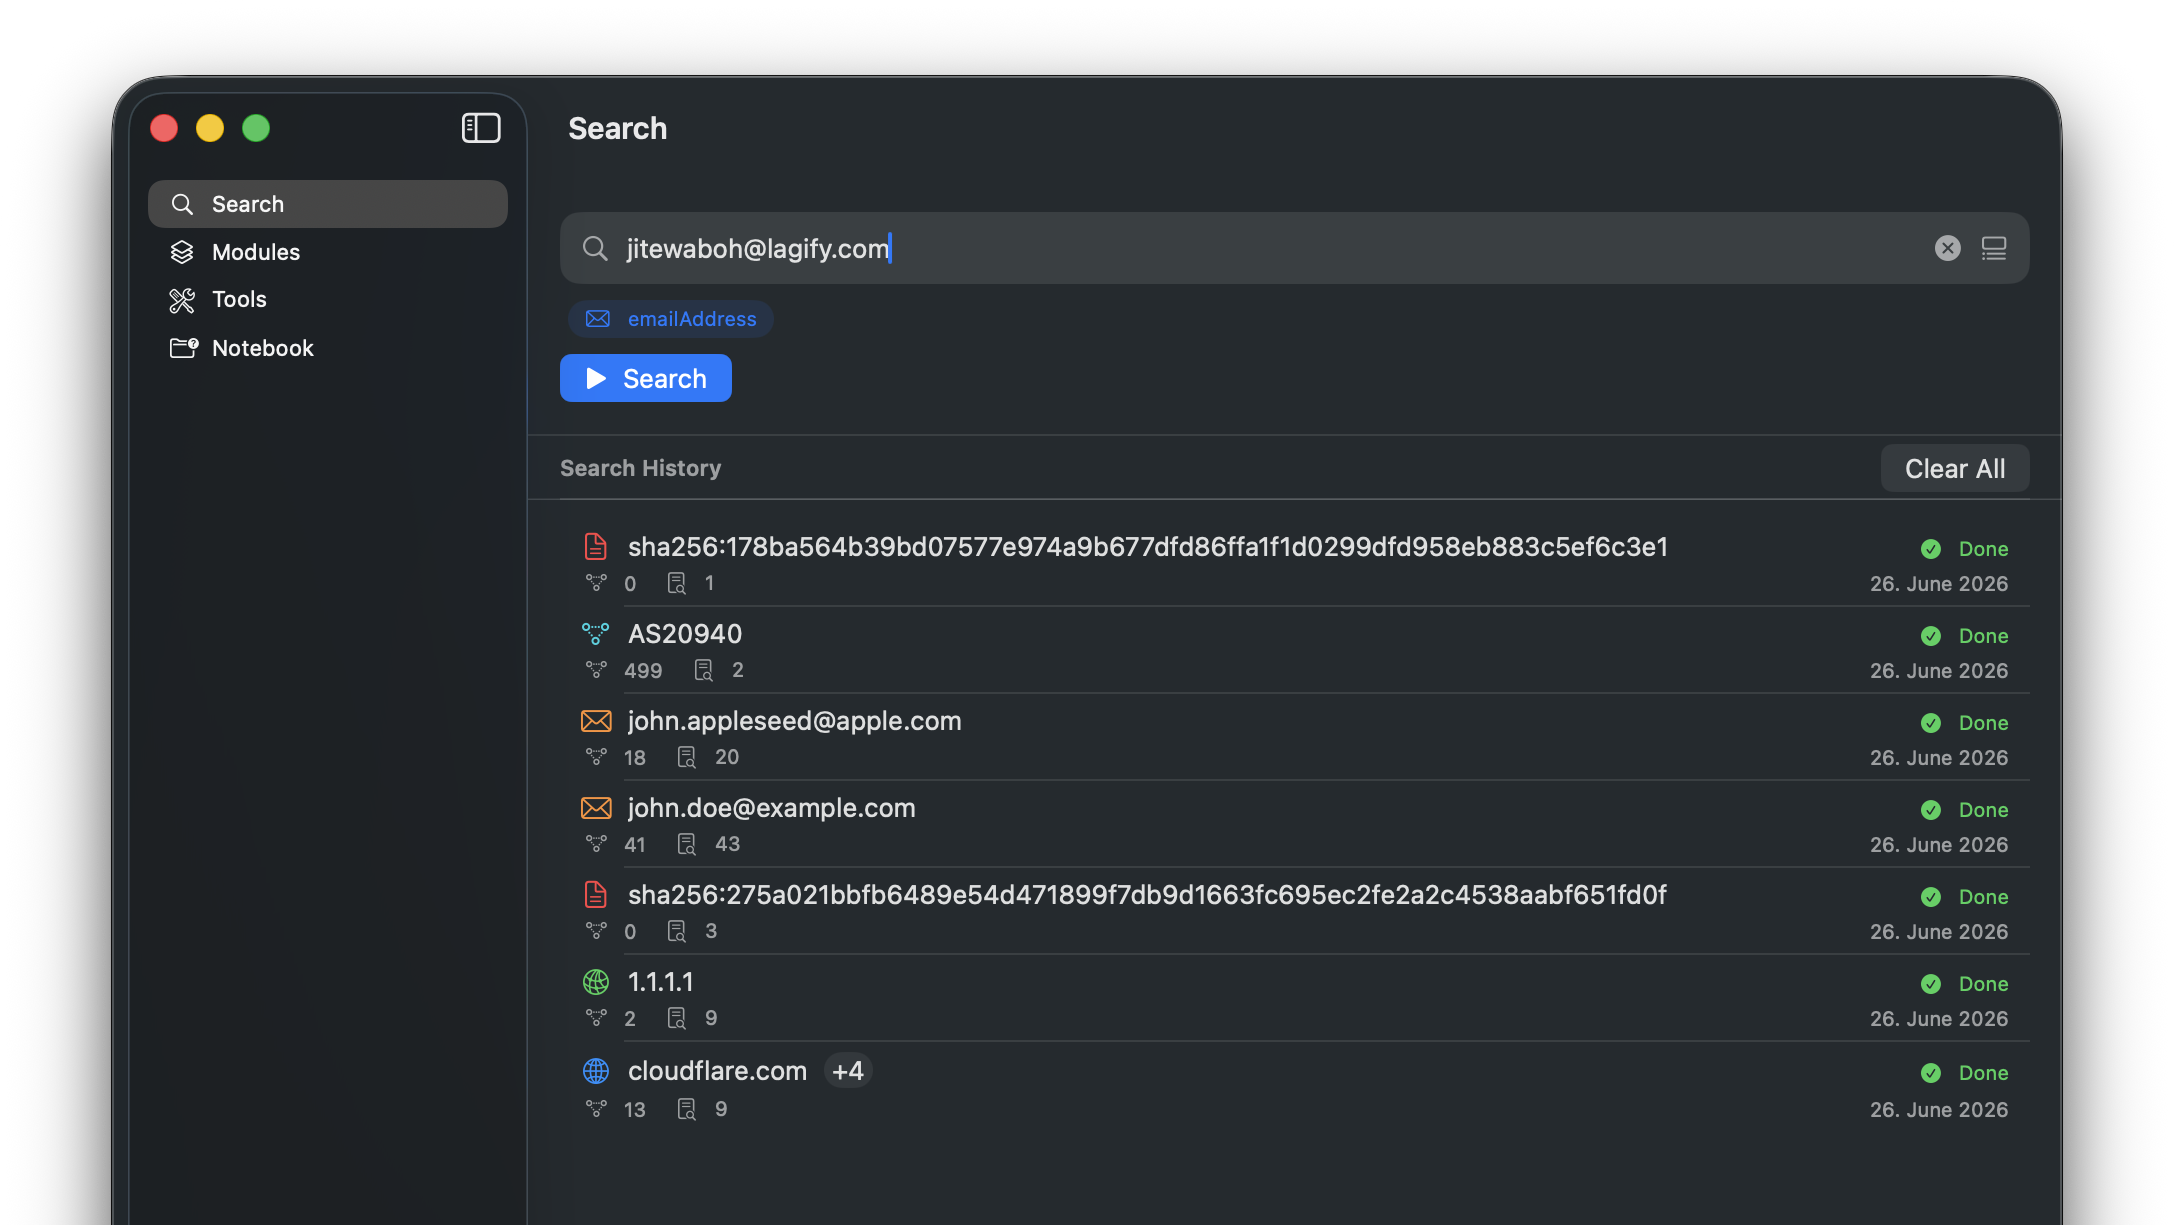
OSINT Toolbox helps you research publicly available information about a domain, IP address, email address, username, phone number, company name, and more. Give it a starting point and it queries a wide range of public sources for you, automatically follows up on what it finds, and helps you make sense of the picture that emerges. This approach is known as passive OSINT (Open-Source Intelligence) — more on what that means in the next chapter.
Beyond the automated scanner, the app also includes a growing collection of standalone Tools you can use on their own — for example a Mail Header Analyzer, a CVE Search, a GeoIP lookup, or a CIDR Calculator, alongside various hashing and encoding utilities.
OSINT Toolbox is a Universal app: buy it once on the App Store and use it on both your Mac and your iPhone or iPad. Start an investigation on the go with an iPhone, then pick it back up right where it left off on an iPad or Mac — everything stays in sync via iCloud.
The app has five main areas, shown in the sidebar on Mac (or the tab bar on iPhone/iPad):
Search — start a new investigation, or pick up a previous one from your search history.
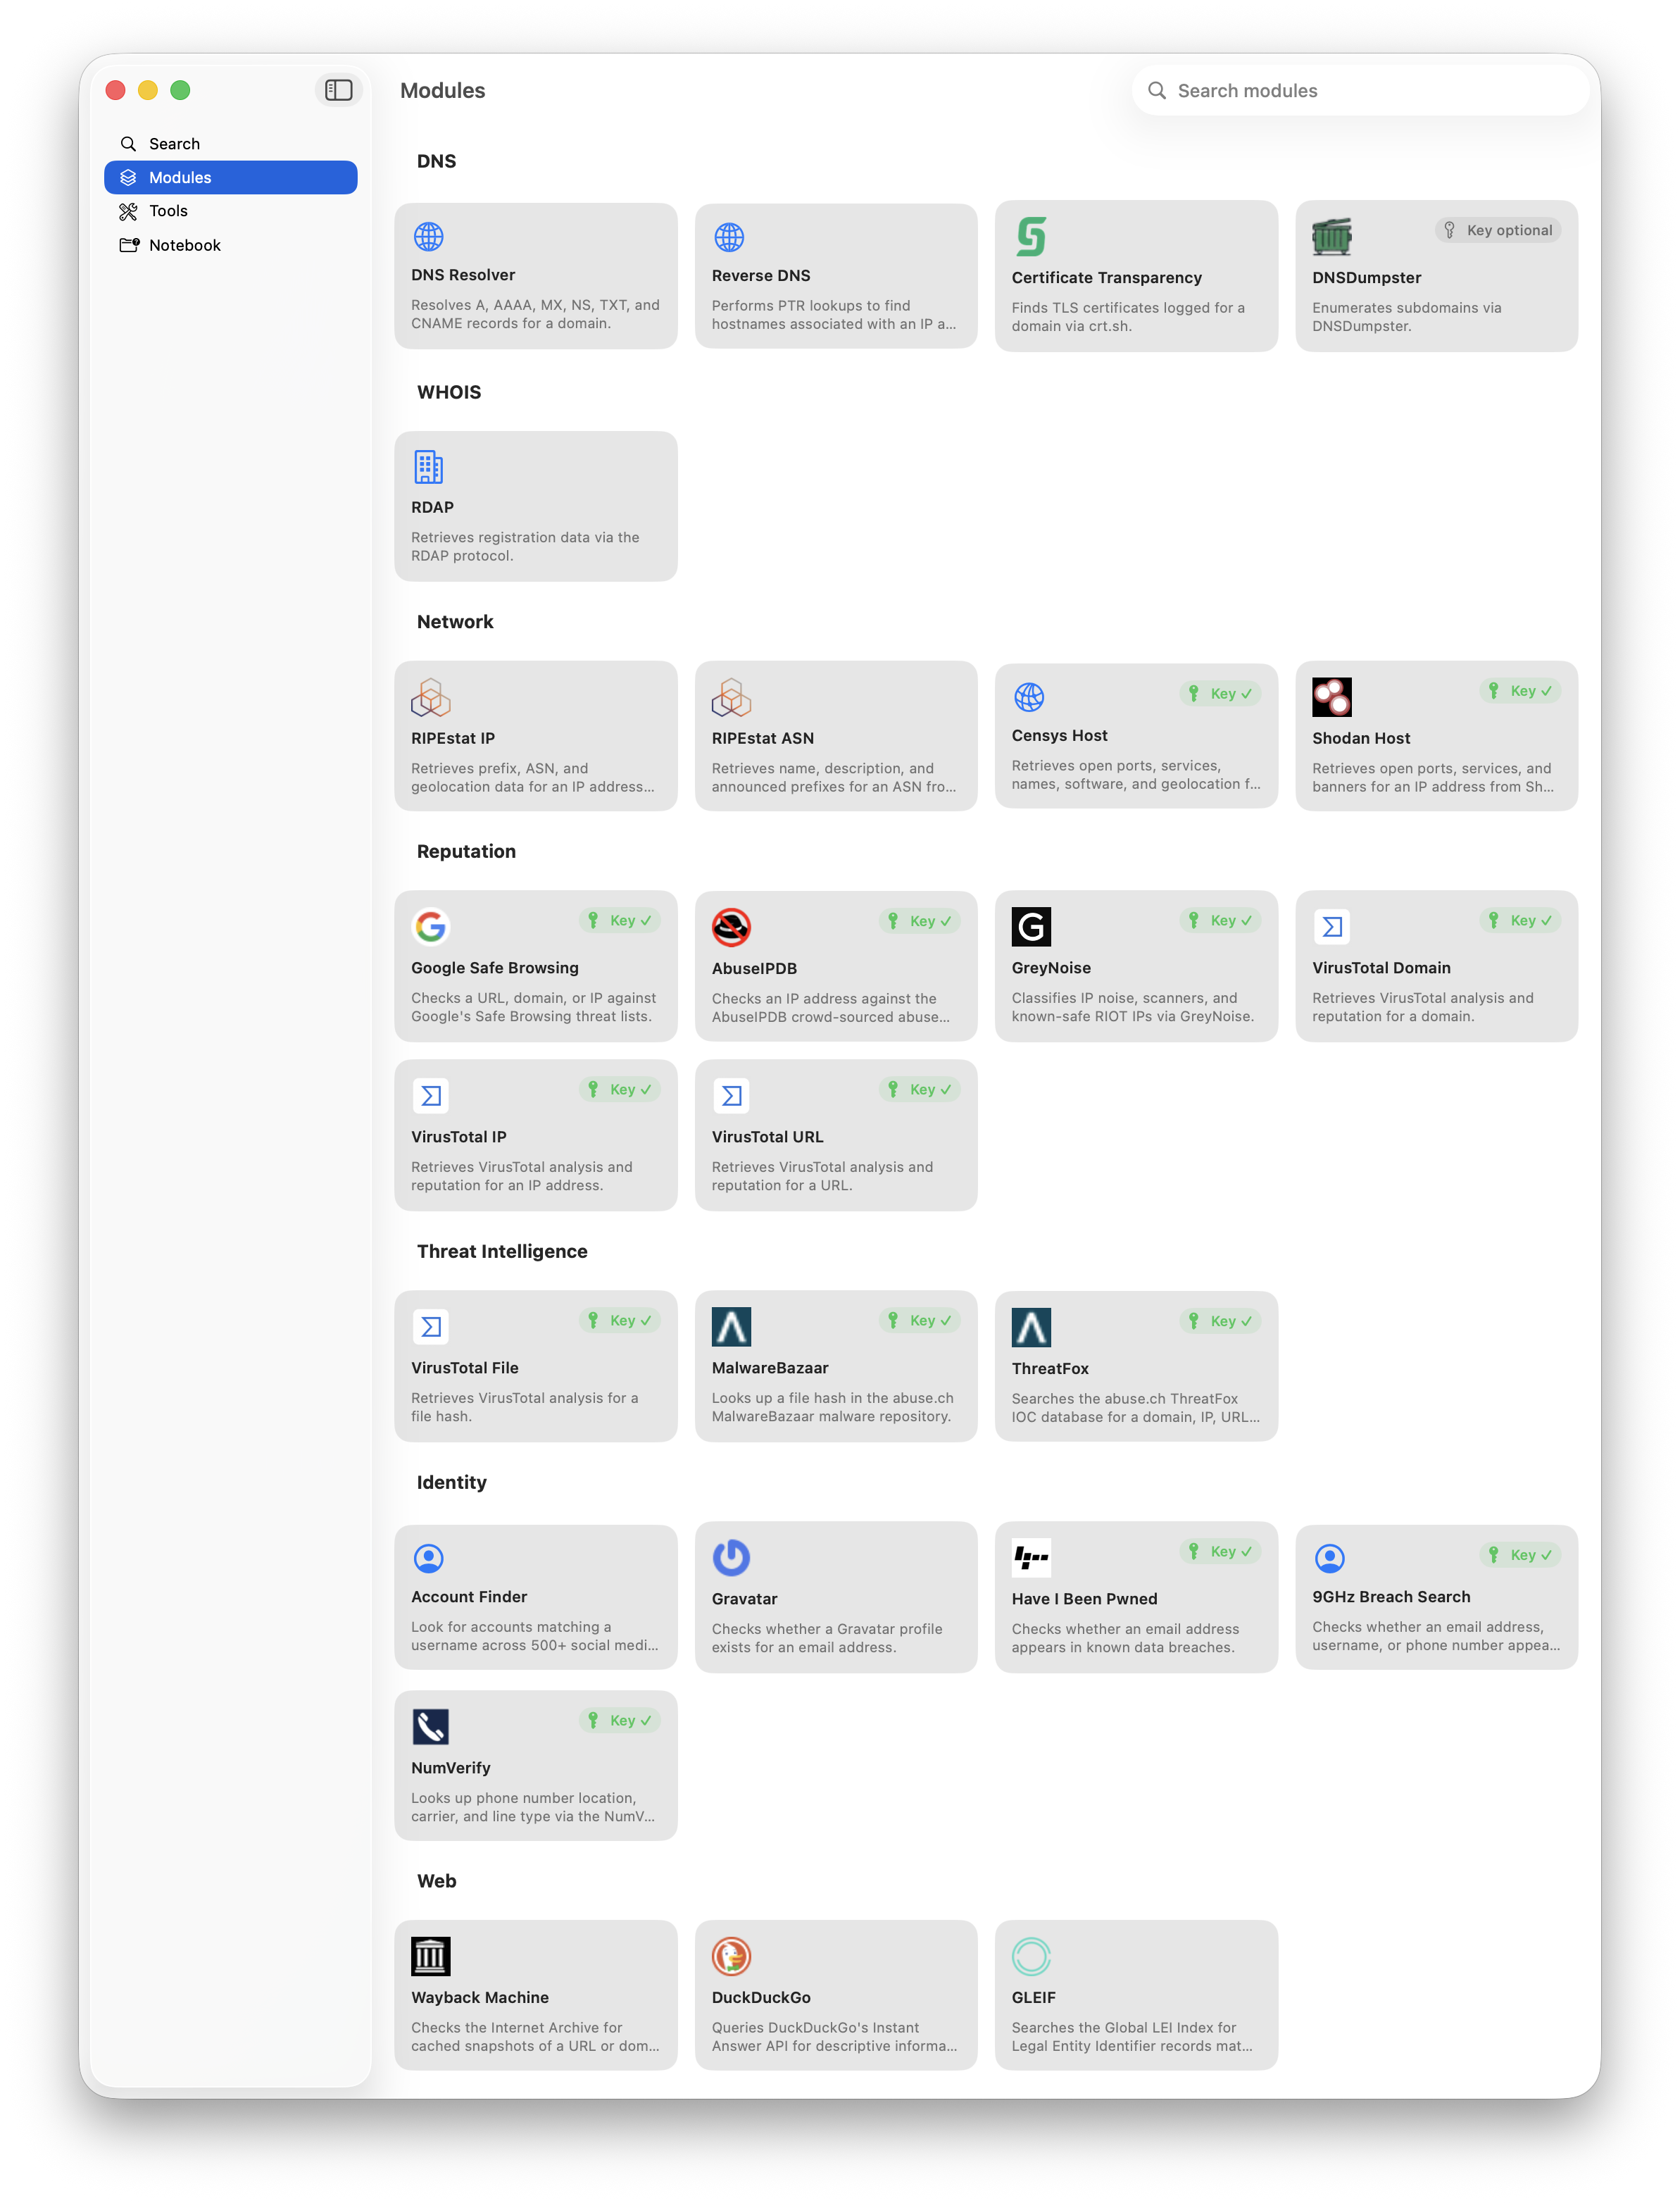
Modules — the catalog of passive scan components that Search draws on.
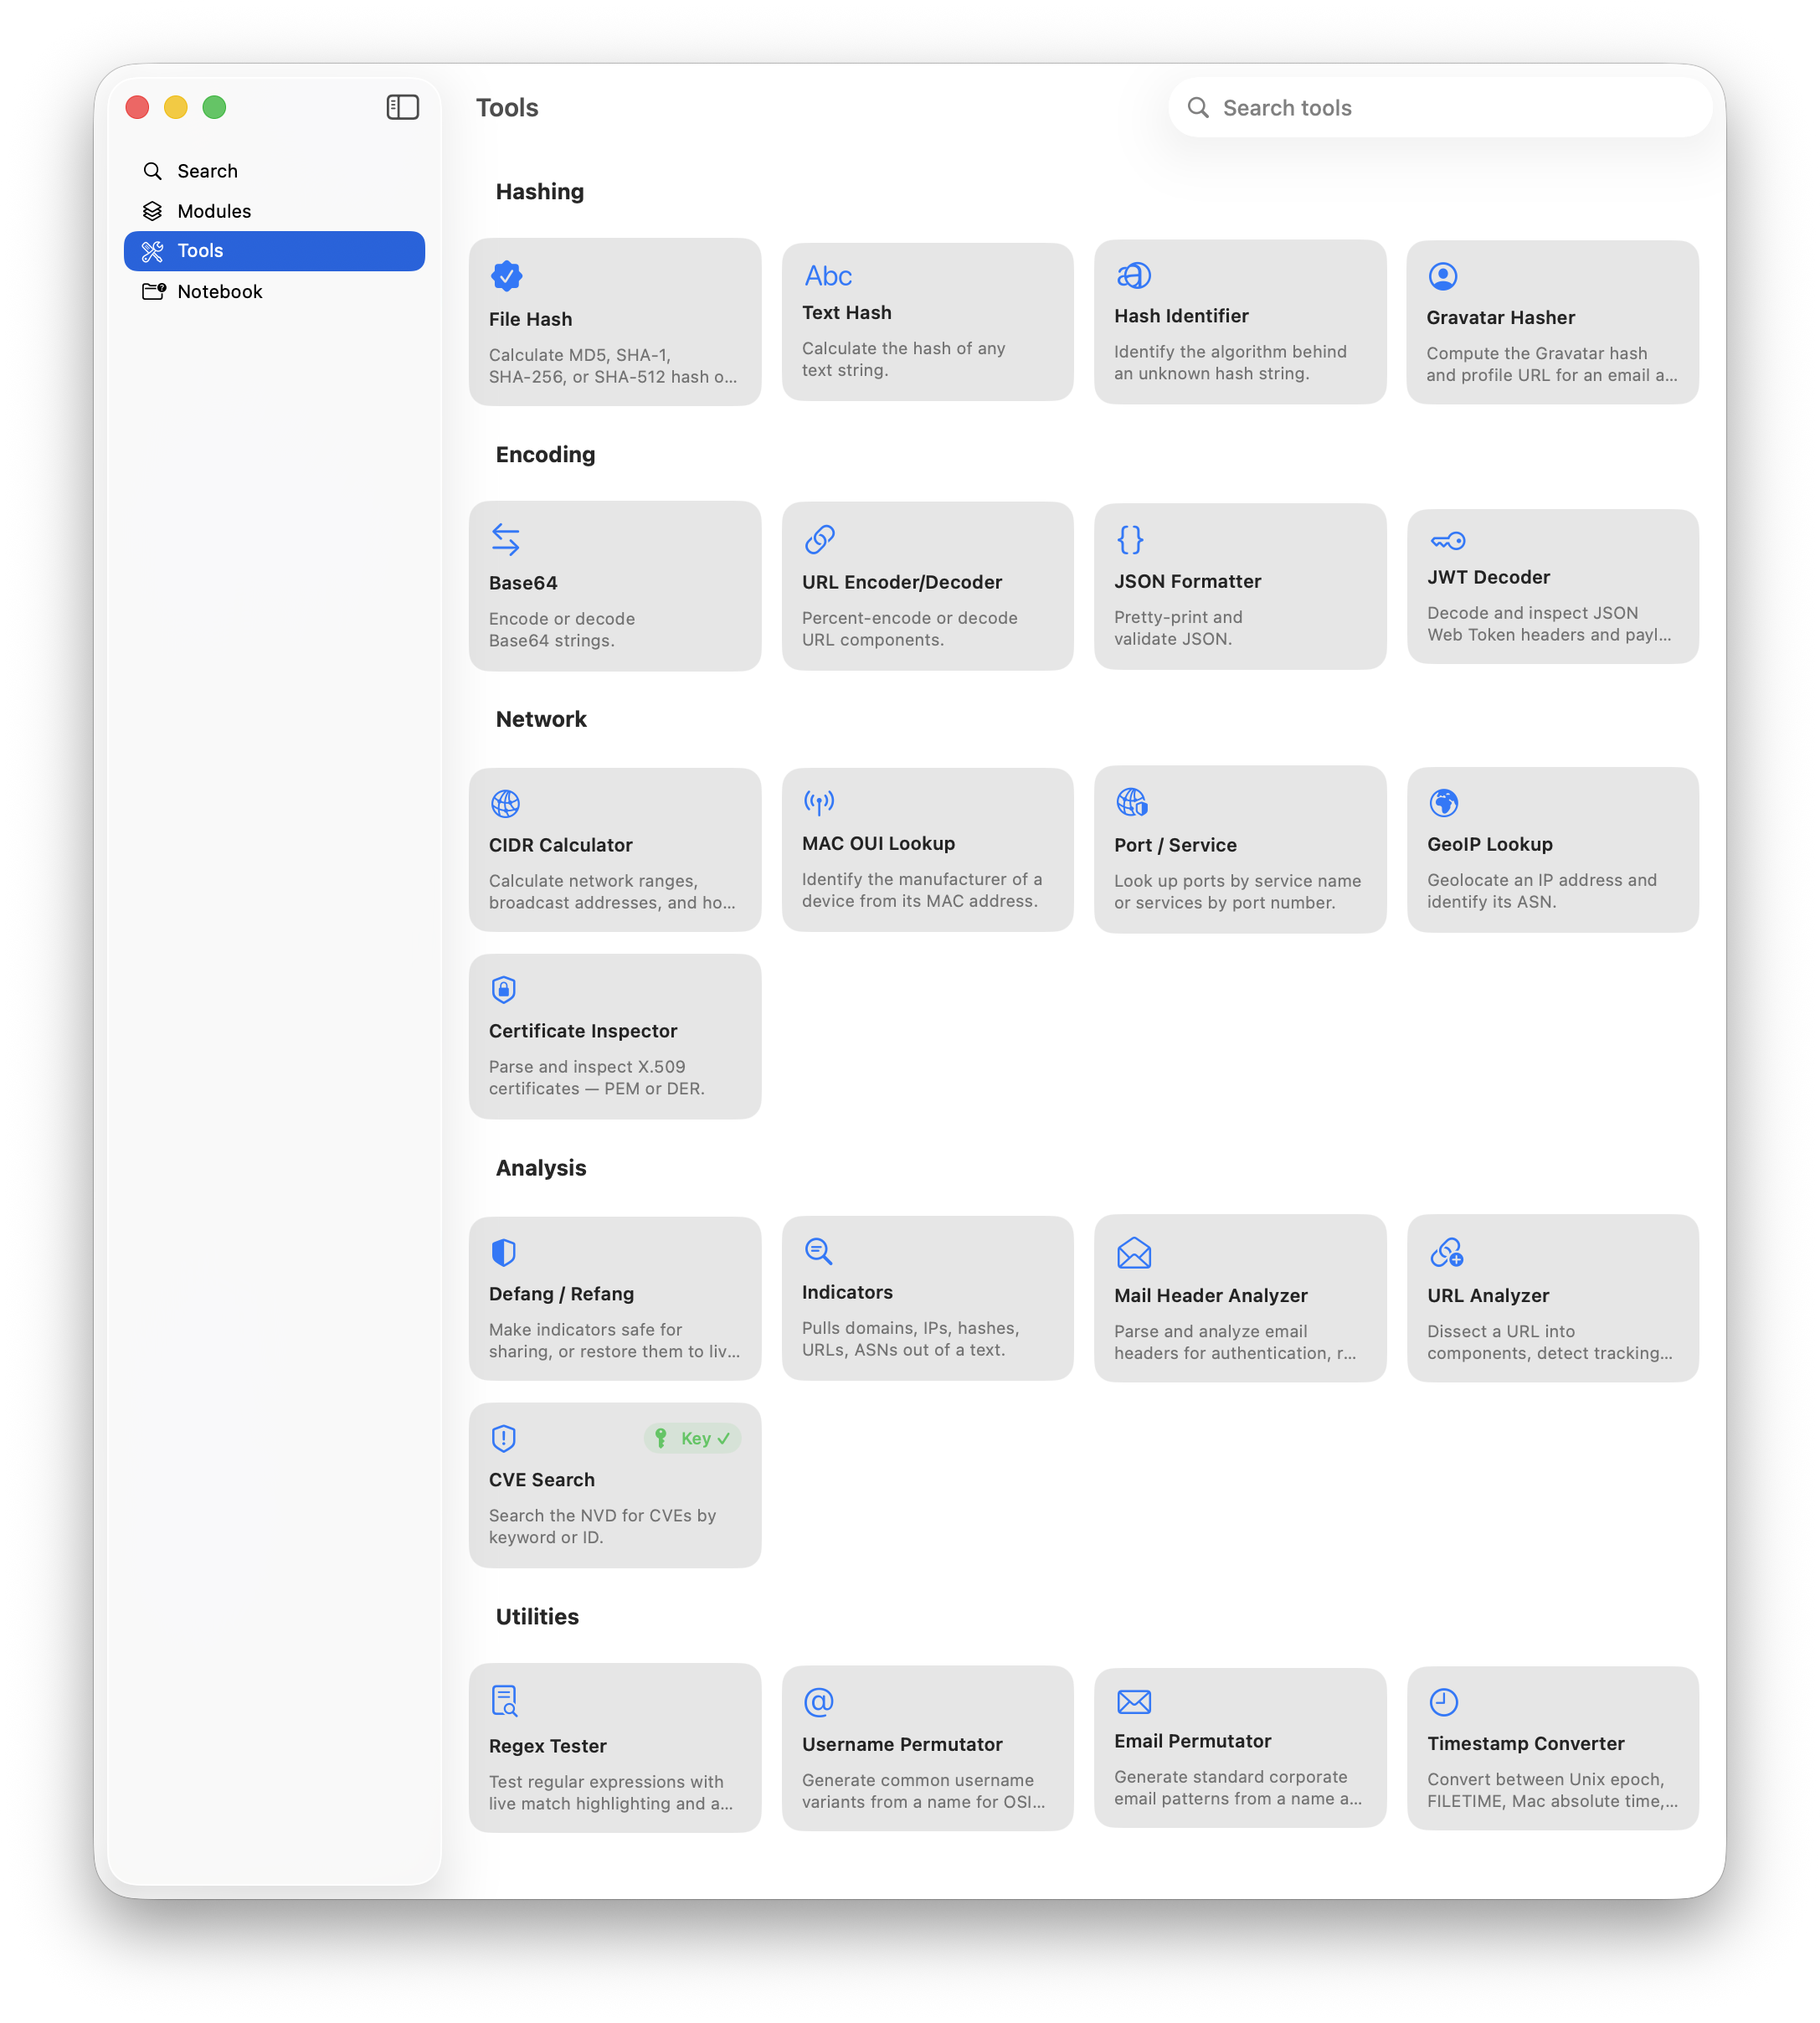
Tools — a growing collection of standalone investigation utilities you can use on their own, independent of a search.
Notebook — collect entities and notes as your investigation develops.
Settings — manage API keys, module preferences, and general app behavior.
Troubleshooting
Should you encounter any issues, please refer to the Common Issues section of the manual first. If you’re unable to find a solution there, feel free to use the app’s Contact Developer feature to reach out for assistance.
What is OSINT?
OSINT stands for Open-Source Intelligence — the practice of gathering information from publicly available sources, rather than from private, hacked, or otherwise unauthorized channels. A “source” in this sense can be anything openly accessible: public records, DNS and certificate data, search engines, social media profiles someone has made public, previously published breach databases, and so on.
The key word is open. None of this involves breaking into systems, guessing passwords, exploiting vulnerabilities, or otherwise interacting with a target beyond querying public information about it. This is often called passive OSINT, to distinguish it from active techniques such as port scanning or vulnerability probing — techniques this app deliberately does not perform, as explained in the Privacy & Security chapter. Even something as familiar as checking a file for malware follows this passive approach: rather than scanning the file itself the way a traditional antivirus would, the app computes a hash — a fingerprint of the file — and checks only that fingerprint against public malware databases, so the file’s content never leaves the device.
People turn to OSINT for many different reasons: security researchers assess their own exposure, journalists verify sources, organizations perform due diligence, and individuals check what information about themselves is publicly visible. OSINT Toolbox brings a wide range of these public sources together in one place, so a single search can be automatically expanded across many of them at once.
The manual
This manual explains how to use OSINT Toolbox: what OSINT is, the different ways to search, the difference between Modules and Tools, how to use the Notebook, and a few worked example use cases to get started. It deliberately does not document individual Modules or Tools one by one — both catalogs keep growing, and each one already has its own description built right into the app.
This manual can be opened from inside the App or directly following this link: https://go-to.me/osint-manual .
If you prefer a printed version, just tap here. This can also be used to save a PDF file of the Manual.
But please keep in mind, that this manual will be updated from time to time.
Requirements
OSINT Toolbox requires the latest major release of the operating system: iOS 26 or macOS 26 at minimum. The app takes advantage of features only available in these releases, so older OS versions are not supported.
Once you have purchased the app on the App Store, you can use it on multiple devices you own at no additional charge — it’s a Universal Purchase covering both the Mac and iPhone/iPad versions. Just make sure the same Apple ID is used across all your devices.
Privacy & Security
Privacy and security were a priority from the very first line of code, not an afterthought. OSINT Toolbox is built using only Apple’s own frameworks — no third-party libraries or SDKs are included anywhere in the app. This keeps its behavior transparent and avoids the hidden data flows that third-party analytics or tracking libraries often introduce.
The app collects no usage data. There is no analytics, no telemetry, and no crash reporting beyond Apple’s own MetricKit. The only network traffic it ever generates is the lookups and public API queries needed to run a search, a Module, or a Tool — nothing is sent anywhere unless a search asks for it.
Each Module only ever talks to the single public source it was built for. A Module built for Shodan sends data to Shodan, and nowhere else — never to a third party, never for any purpose beyond that Module’s stated function.
API keys are stored exclusively in iCloud Keychain. They are never logged, never exported, and never transmitted anywhere except to the service they authenticate against.
Most importantly, OSINT Toolbox is passive only: it never performs active scanning, port probing, vulnerability testing, or anything else that touches target infrastructure directly. Every Module works by querying public third-party sources about an indicator — never by contacting the indicator itself.
Because of all this, OSINT Toolbox’s App Store privacy label reads Data Not Collected, across every category.
Searching
There are several ways to start an investigation in OSINT Toolbox, each suited to a different situation.
Typing a bare term
The simplest way to search is to type what you’re investigating straight into the search field — a domain, an IP address, an email address, a file hash, and so on — and start the search. The app tries to automatically detect what kind of indicator was entered and picks a sensible starting point.
This is the fastest way to search, but automatic detection isn’t foolproof — a bare username or company name looks the same as ordinary text and can’t be reliably guessed.
Prefixed search terms
For anything the app can’t safely guess, or whenever more certainty is wanted, prefix the search term with its type, followed by a colon:
domain:example.comip:1.2.3.4email:john@example.comusername:jsmithcompany:Example Inchash:44d88612fea8a8f36de82e1278abb02f(sha256:,sha1:,sha512:, andmd5:also work)asn:AS20940cert:,netblock:,url:, andphone:follow the same pattern
Prefixing removes any ambiguity and is required for usernames and company names, since neither can be told apart from ordinary text otherwise. Phone numbers are the one exception — a value starting with a + followed by digits is recognized automatically, without needing a prefix.
Beyond these built-in type prefixes, custom preset:name prefixes can also be used — Presets are maintained under Settings.
The Search Builder
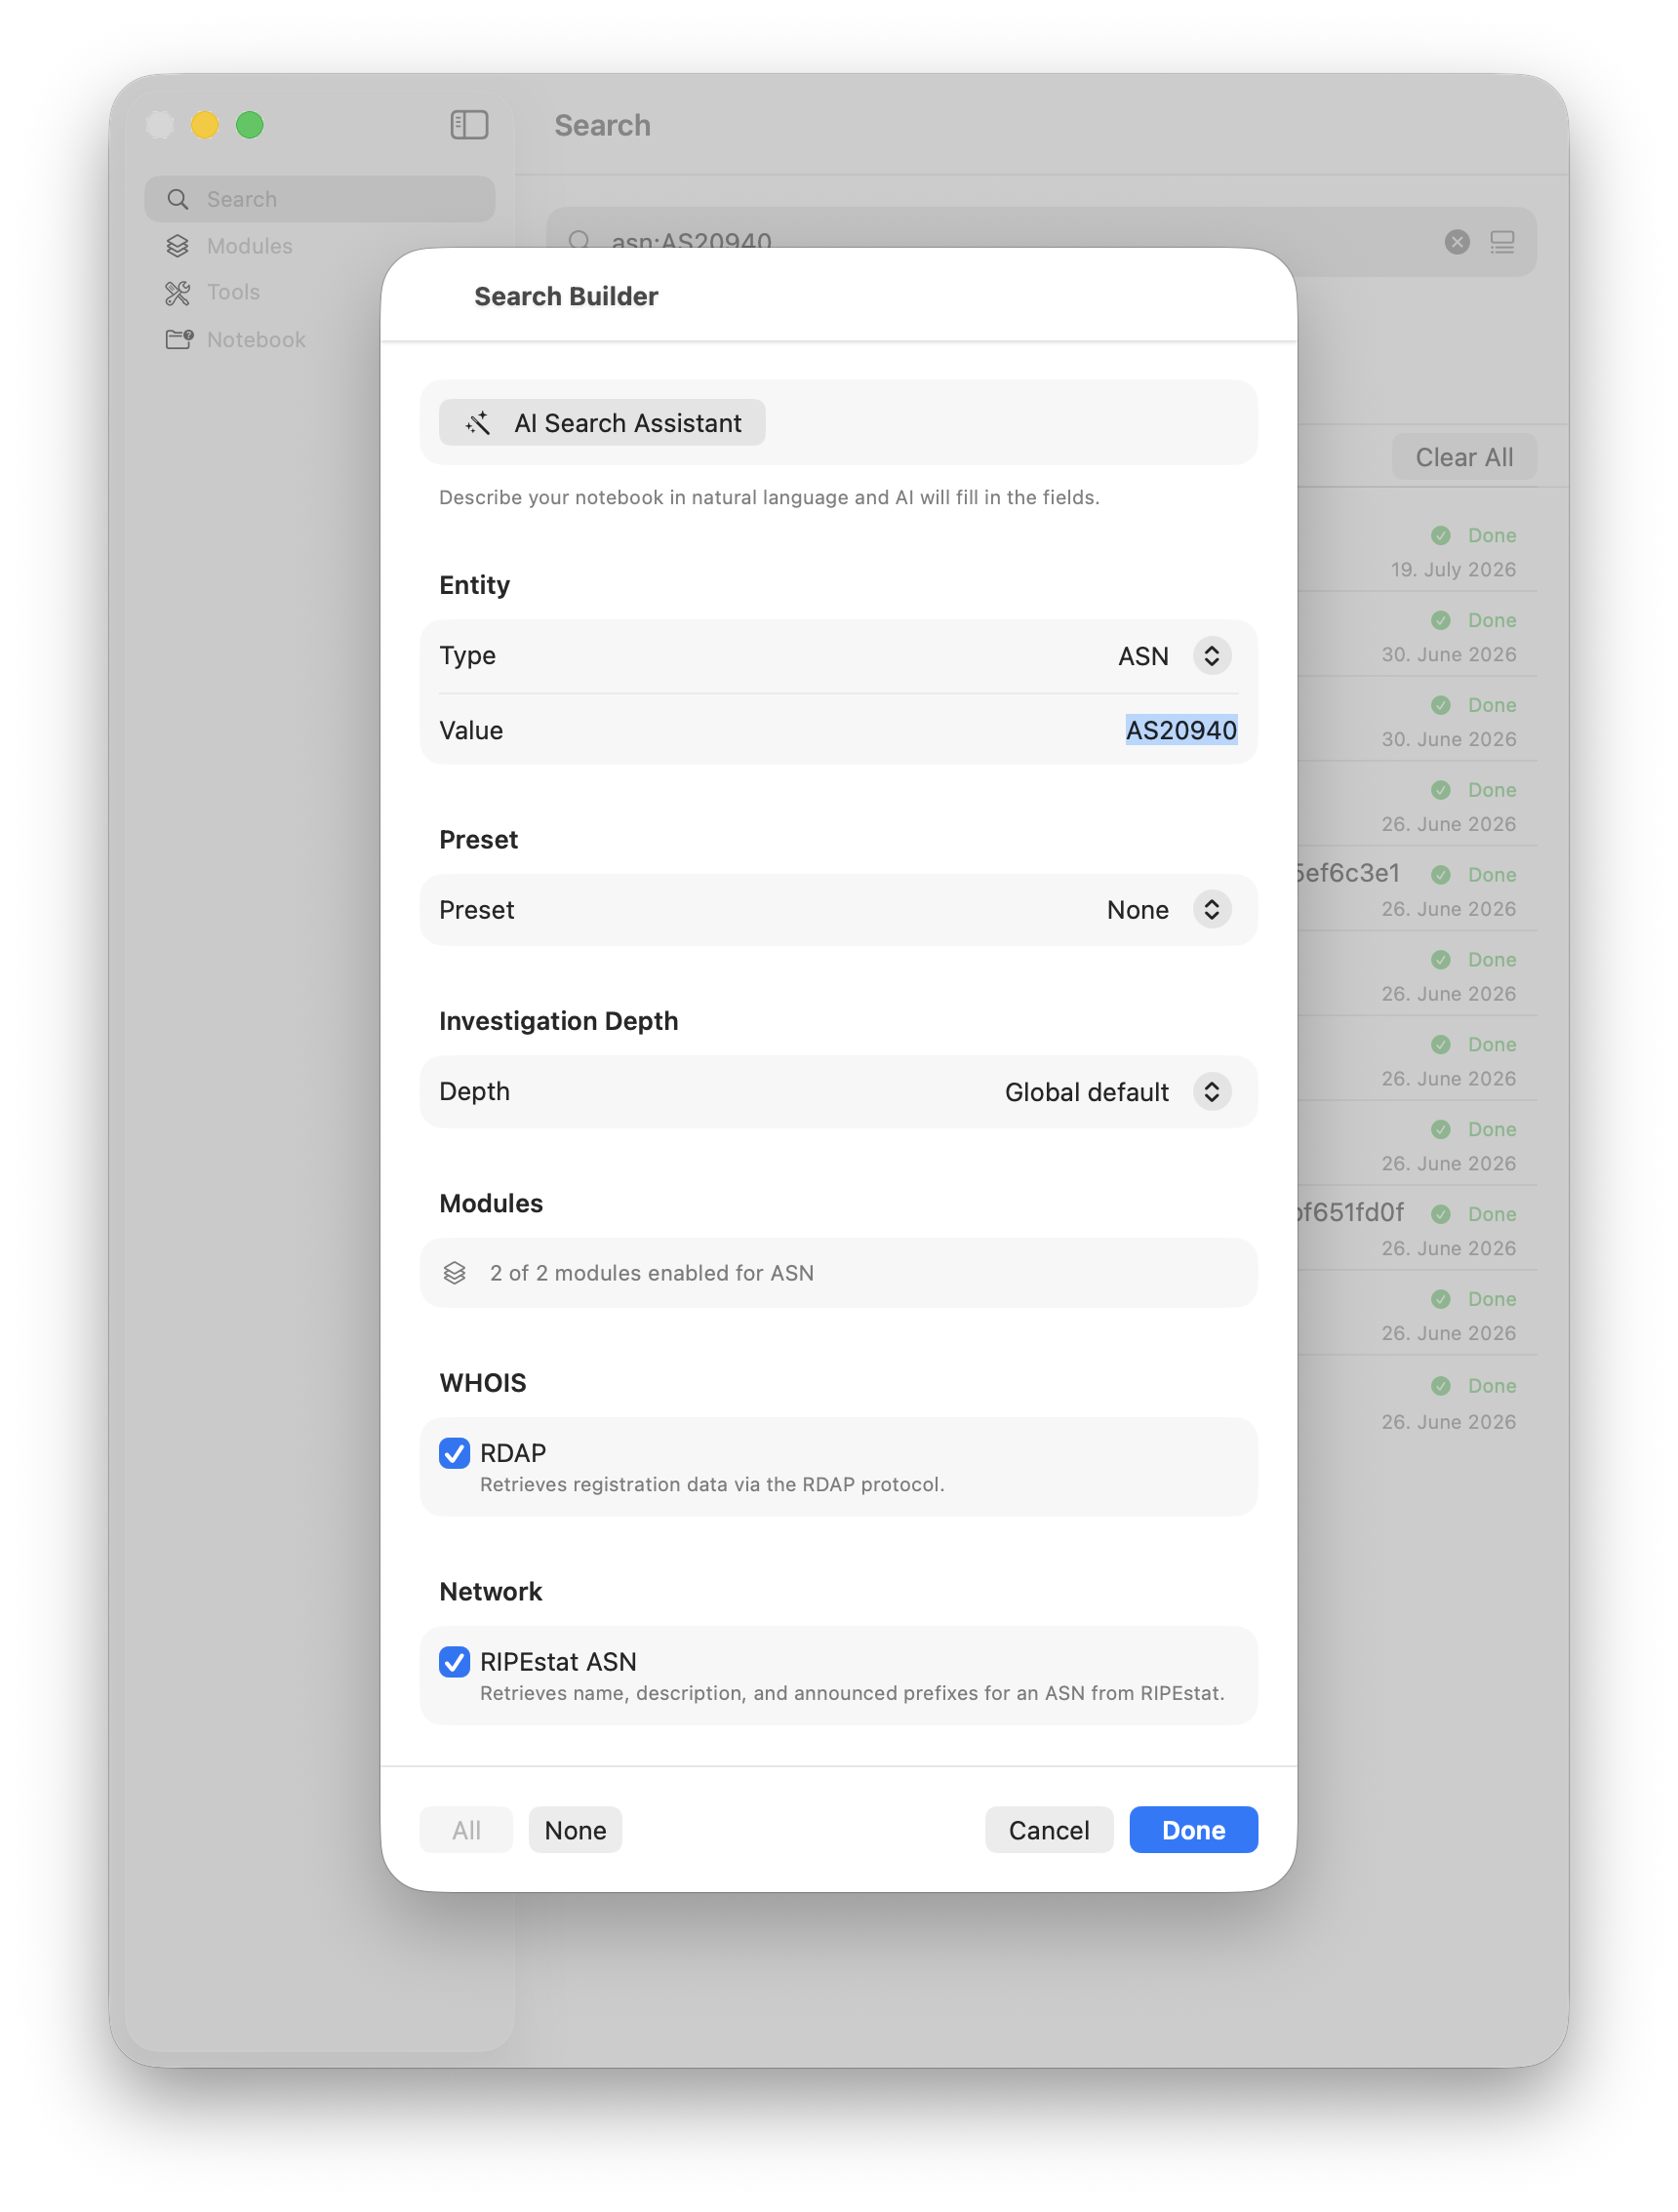
For more control, open the Search Builder from the button at the trailing edge of the search field. It brings together the entity type, the indicator value, an optional investigation depth (how many pivot hops the investigation should follow), a preset (a saved combination of type, Modules, and depth), and a list of which Modules should run — all in one place, without needing to remember any prefixes. Presets themselves are created and managed in Settings.
The AI Search Assistant
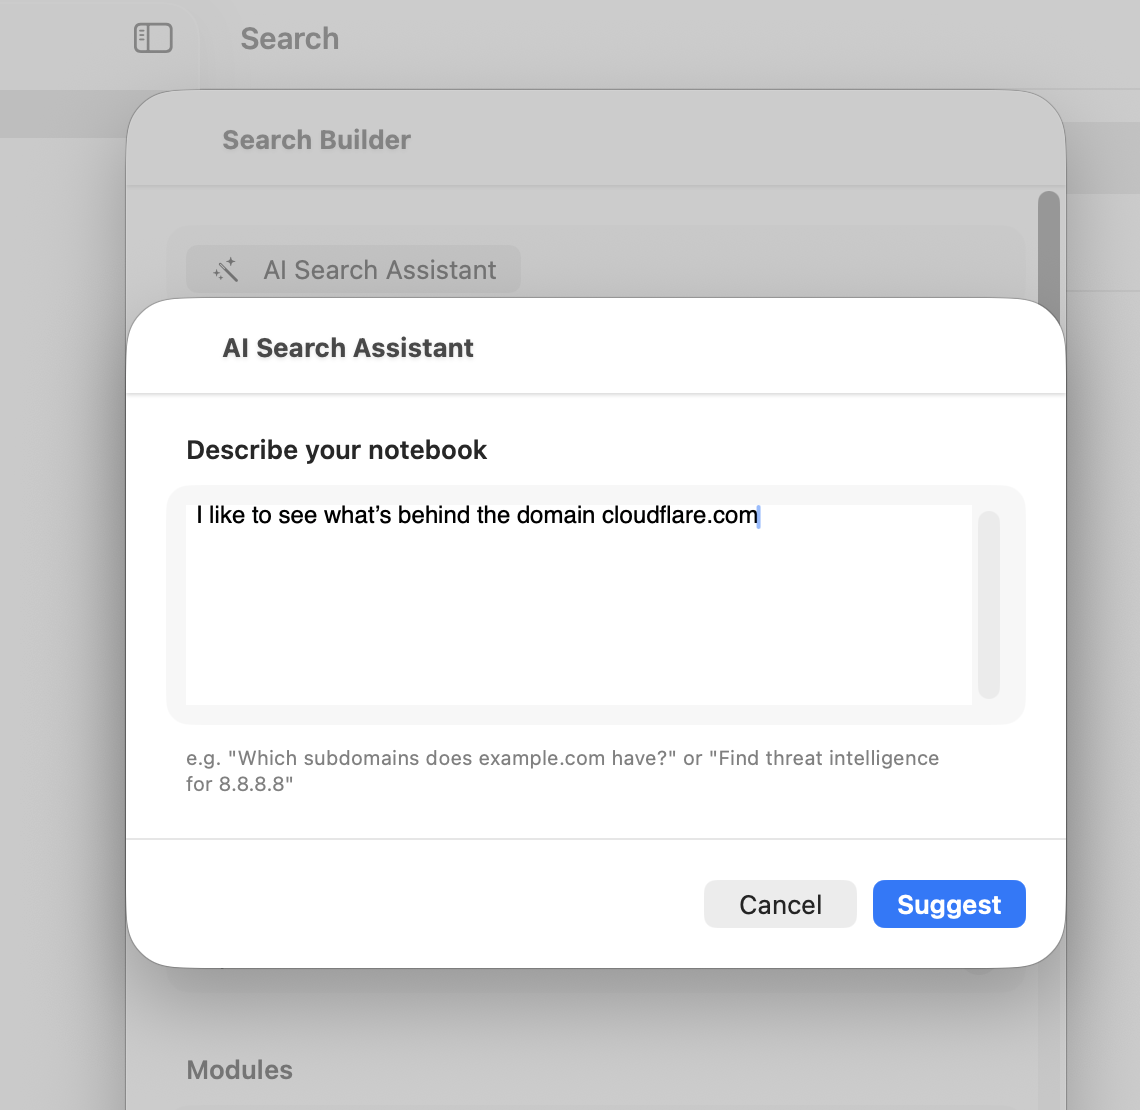
Where available, the Search Builder also offers an AI Search Assistant: describe what’s being looked for in plain language, and it fills in the Search Builder’s fields automatically — entity type, value, and a sensible set of Modules. This runs entirely on-device.
Which to use
A bare term is fastest for a quick, obvious search.
A prefixed term is fastest once the shorthand is familiar, and the only way to search directly for a username or company name.
The Search Builder is the most thorough option, useful when depth or Module selection needs fine-tuning.
The AI Search Assistant is the easiest starting point when describing the goal is easier than learning the search syntax.
Patience
A search can take some time to complete, especially at greater depth or with many Modules enabled — the app is querying a number of independent public sources step by step, some of which enforce their own rate limits. Progress is shown live, so there’s no need to wait for a search to fully finish before reviewing what has already come in.
The default Investigation Depth applied when none is chosen for an individual search can be adjusted under Settings.
Reviewing your results
A search is shown across three tabs: Findings, Entities, and Log.
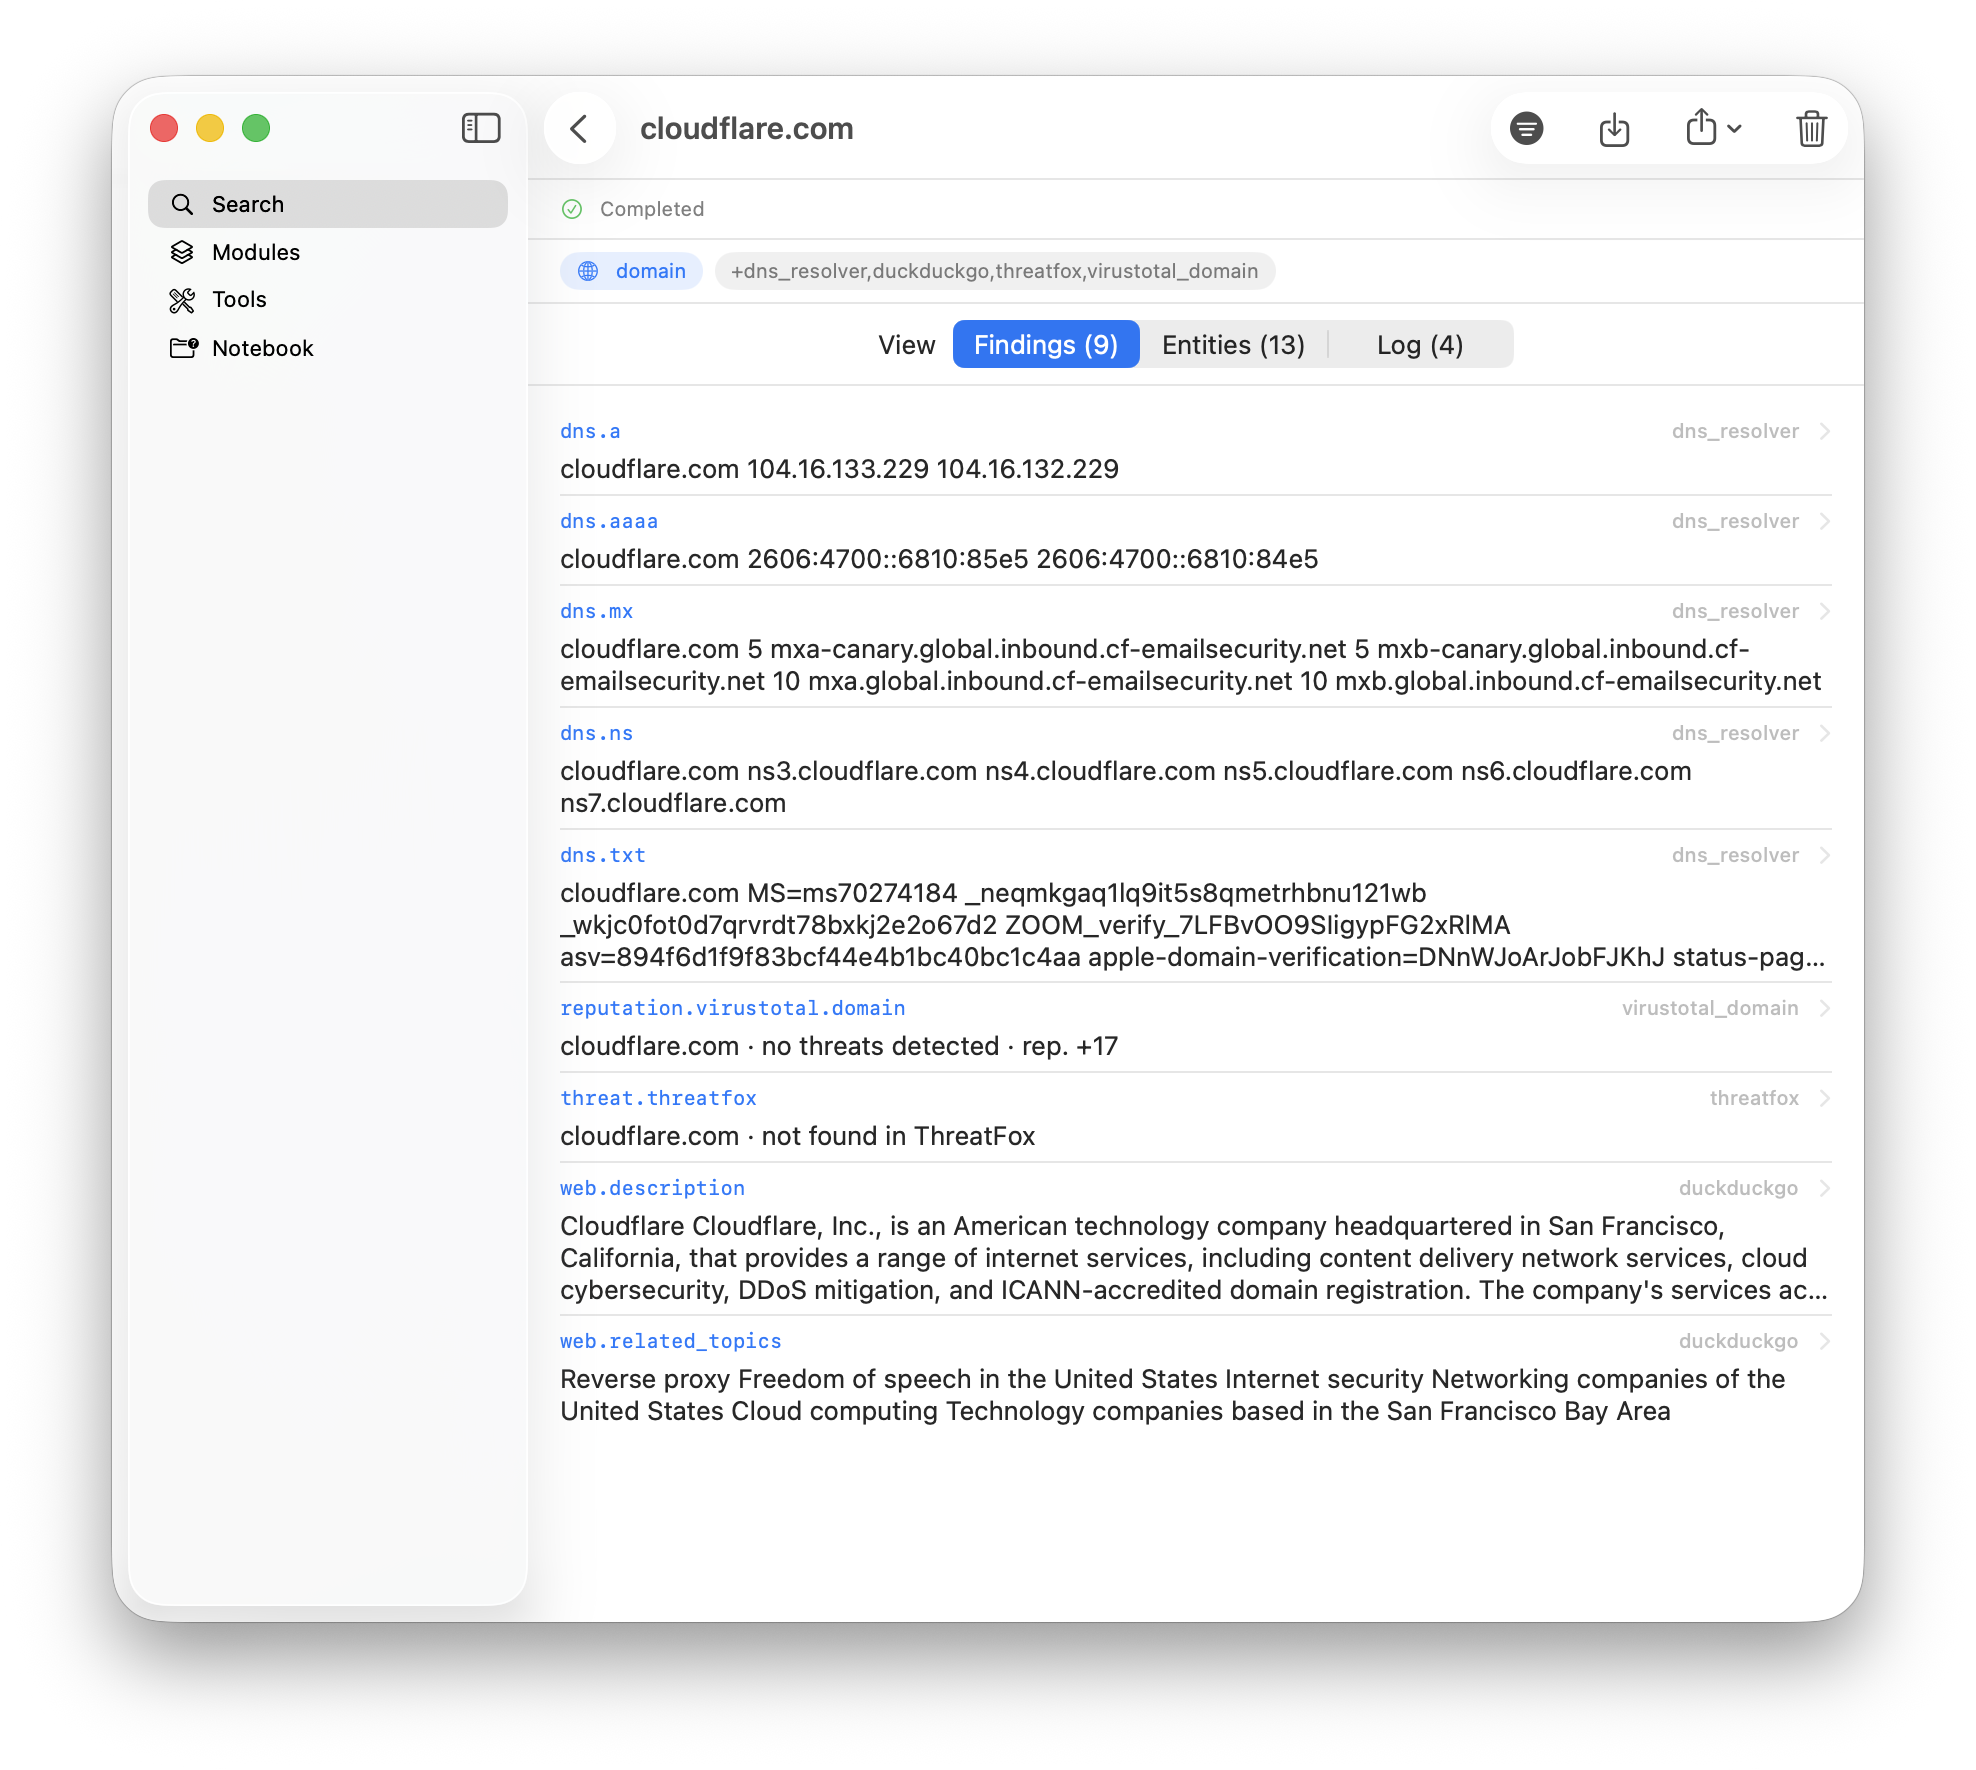
Findings lists every individual fact returned by a Module — anything from a DNS record to a company’s registered address — each tagged with the Module that produced it. Tapping a Finding opens its full detail.
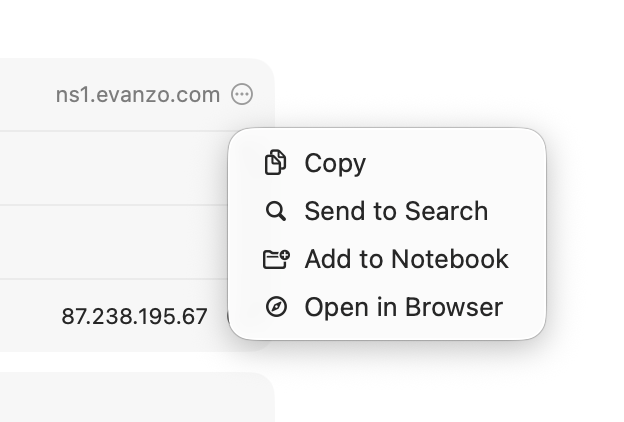
Entities lists everything discovered that can itself be investigated further, such as domains or IP addresses. Each entity row has a ⋯ menu offering Copy, Send to Search (to continue investigating from that entity), Add to Notebook, and, depending on the entity’s type, further options such as opening it in a Tool or in the browser.
Log records what happened while each Module ran — useful when a Module comes back empty, since that often means an API key was missing or invalid, or that a rate limit was hit, and the Log will usually say so.
Modules & Tools
OSINT Toolbox’s functionality comes from two related but distinct catalogs: Modules and Tools.
A Module is a passive scan component wired into the Search engine. When a search runs, the app automatically triggers the Modules relevant to the current indicator; each Module queries a single public source and may add new entities — domains, IP addresses, people, and so on — to the investigation, which the engine can then automatically follow up on in turn. This is what lets an investigation branch out on its own, rather than staying limited to the single term originally searched.
A Tool, on the other hand, is a standalone utility run directly by hand, independent of any search — for example computing a hash, decoding a JWT, or looking up a CIDR range. Tools never run automatically and never trigger follow-up investigation on their own, though many can send their result straight into Search to start one.
Both catalogs are under constant, ongoing expansion, so this manual describes them conceptually rather than one by one. Every Module and Tool includes its own description directly in the app, in its detail view.
API Keys
Some Modules and Tools rely on a third-party provider’s API, which may require a key:
No key needed — most Modules and Tools work right away, with no account or key required.
Key optional — a few work without a key, but accept one to lift a rate limit or unlock fuller results. These show a grey “Key optional” badge.
Key required — a handful genuinely won’t run without a key, because the underlying provider requires one to use their service at all. These show an orange “Key required” badge.
Every Module or Tool that needs a key explains, right in its own detail view, where to obtain one — usually including a direct link to the provider’s site, making registration quick. Most of these providers offer a free tier that’s more than enough for typical use, and registering with an anonymized address such as Apple’s Hide My Email usually works just fine. Once obtained, a key is entered directly on that Module’s or Tool’s detail screen, or added centrally in Settings → API Keys, where every key currently in use is listed in one place. Keys are stored only in iCloud Keychain and are never sent anywhere except the service they belong to.
Notebook
Search History keeps a chronological log of past searches, but when working across several unrelated investigations at once, it helps to keep them apart. That’s what Notebooks are for: a place to collect entities and results — from searches, Modules, or Tools alike — under a common name.
Wherever an entity or result appears in the app, its ⋯ menu offers an Add to Notebook action, listing existing Notebooks to add to, or letting a new one be created on the spot.
Alongside entities, each Notebook has a General Notes free-text area for writing anything else worth capturing, saved automatically as it’s edited, plus a running list of individual Text Notes that can either be typed in directly or captured straight from a finding via Add as Note to Notebook.
Notebooks are kept in iCloud, the same way scans are, so they stay available across devices.
Settings
Settings can be found under OSINT Toolbox → Settings on Mac, or the Settings tab on iPhone and iPad, organized into six sections: General, API Keys, Search, AI, Privacy, and Support.
General
General settings cover overall app behavior, including which DNS-over-HTTPS provider is used for lookups, and the default Investigation Depth applied when none is chosen for an individual search.
API Keys
Every API key currently in use, for both Modules and Tools, is listed here in one place — see the Modules & Tools chapter for how keys work and where to obtain one.
Search
Custom Presets can be created here — a saved combination of entity type, Investigation Depth, and Module selection, ready to use directly from the Search Builder. This is useful for search patterns used repeatedly, without reconfiguring the Search Builder every time.
AI
Controls whether AI-powered features, such as the AI Search Assistant, are enabled at all.
Privacy
Allows Search History to be cleared at any time.
Support
Offers What’s New for the current app version, quick access to this manual, and the app’s Contact Developer feature for further assistance.
Use Cases
A few concrete examples of how the pieces described so far fit together.
Investigating a suspicious email
Received something that looks like phishing or spam? Copy the email’s raw headers (most mail clients offer a “View Source” or “Show Original” option) into the Mail Header Analyzer Tool. It breaks down the hops the message took, along with its SPF, DKIM, and DMARC authentication results, and surfaces the sending server’s IP address and domain.
From there, send the sending IP address or domain to Search to check its reputation and ownership — turning up who it belongs to and whether it has a history of abuse.
Looking someone up by username
Search username:johnappleseed to check where else that username shows up. One Module checks it against a wide range of known platforms and reports which ones have a matching profile; another checks whether the same username turns up in previously published breach data.
Researching a company
Search company:Example Inc to look up an organization’s official registration details, resolving the name against a legal-entity registry to return its legal name, jurisdiction, and registration status where available — a quick sanity check on whether a business is what it claims to be.
Investigating a domain or IP address
Search domain:example.com or ip:1.2.3.4 to build out a fuller picture of infrastructure. Expect DNS records and current IP addresses, WHOIS/RDAP-style registration data, subdomains discovered via public certificate logs, historical snapshots of the site, and — for IP addresses — details like network ownership, exposed services, and abuse or reputation history.
Checking a suspicious file
Rather than scanning the file itself, compute its hash with the File Hash Tool, then use Send to Search on the result. Searching a hash runs it against public malware databases, returning whether the file is already known to be malicious, and if so, what it’s been identified as.
Recommended Reading
A few books worth a look for going deeper into OSINT:
Common Issues
There are no known issues at this time. Should any arise, they will be added here.
Latest Version
The App is designed to be fully compatible with the latest iOS and macOS versions. If you are experiencing any issues, please ensure that you have the latest version of the App and the most recent iOS and macOS update installed.